Use case
If you do not consider this situation during the design phase, the result is often blocks of uneven height, which harms readability and overall visual consistency.
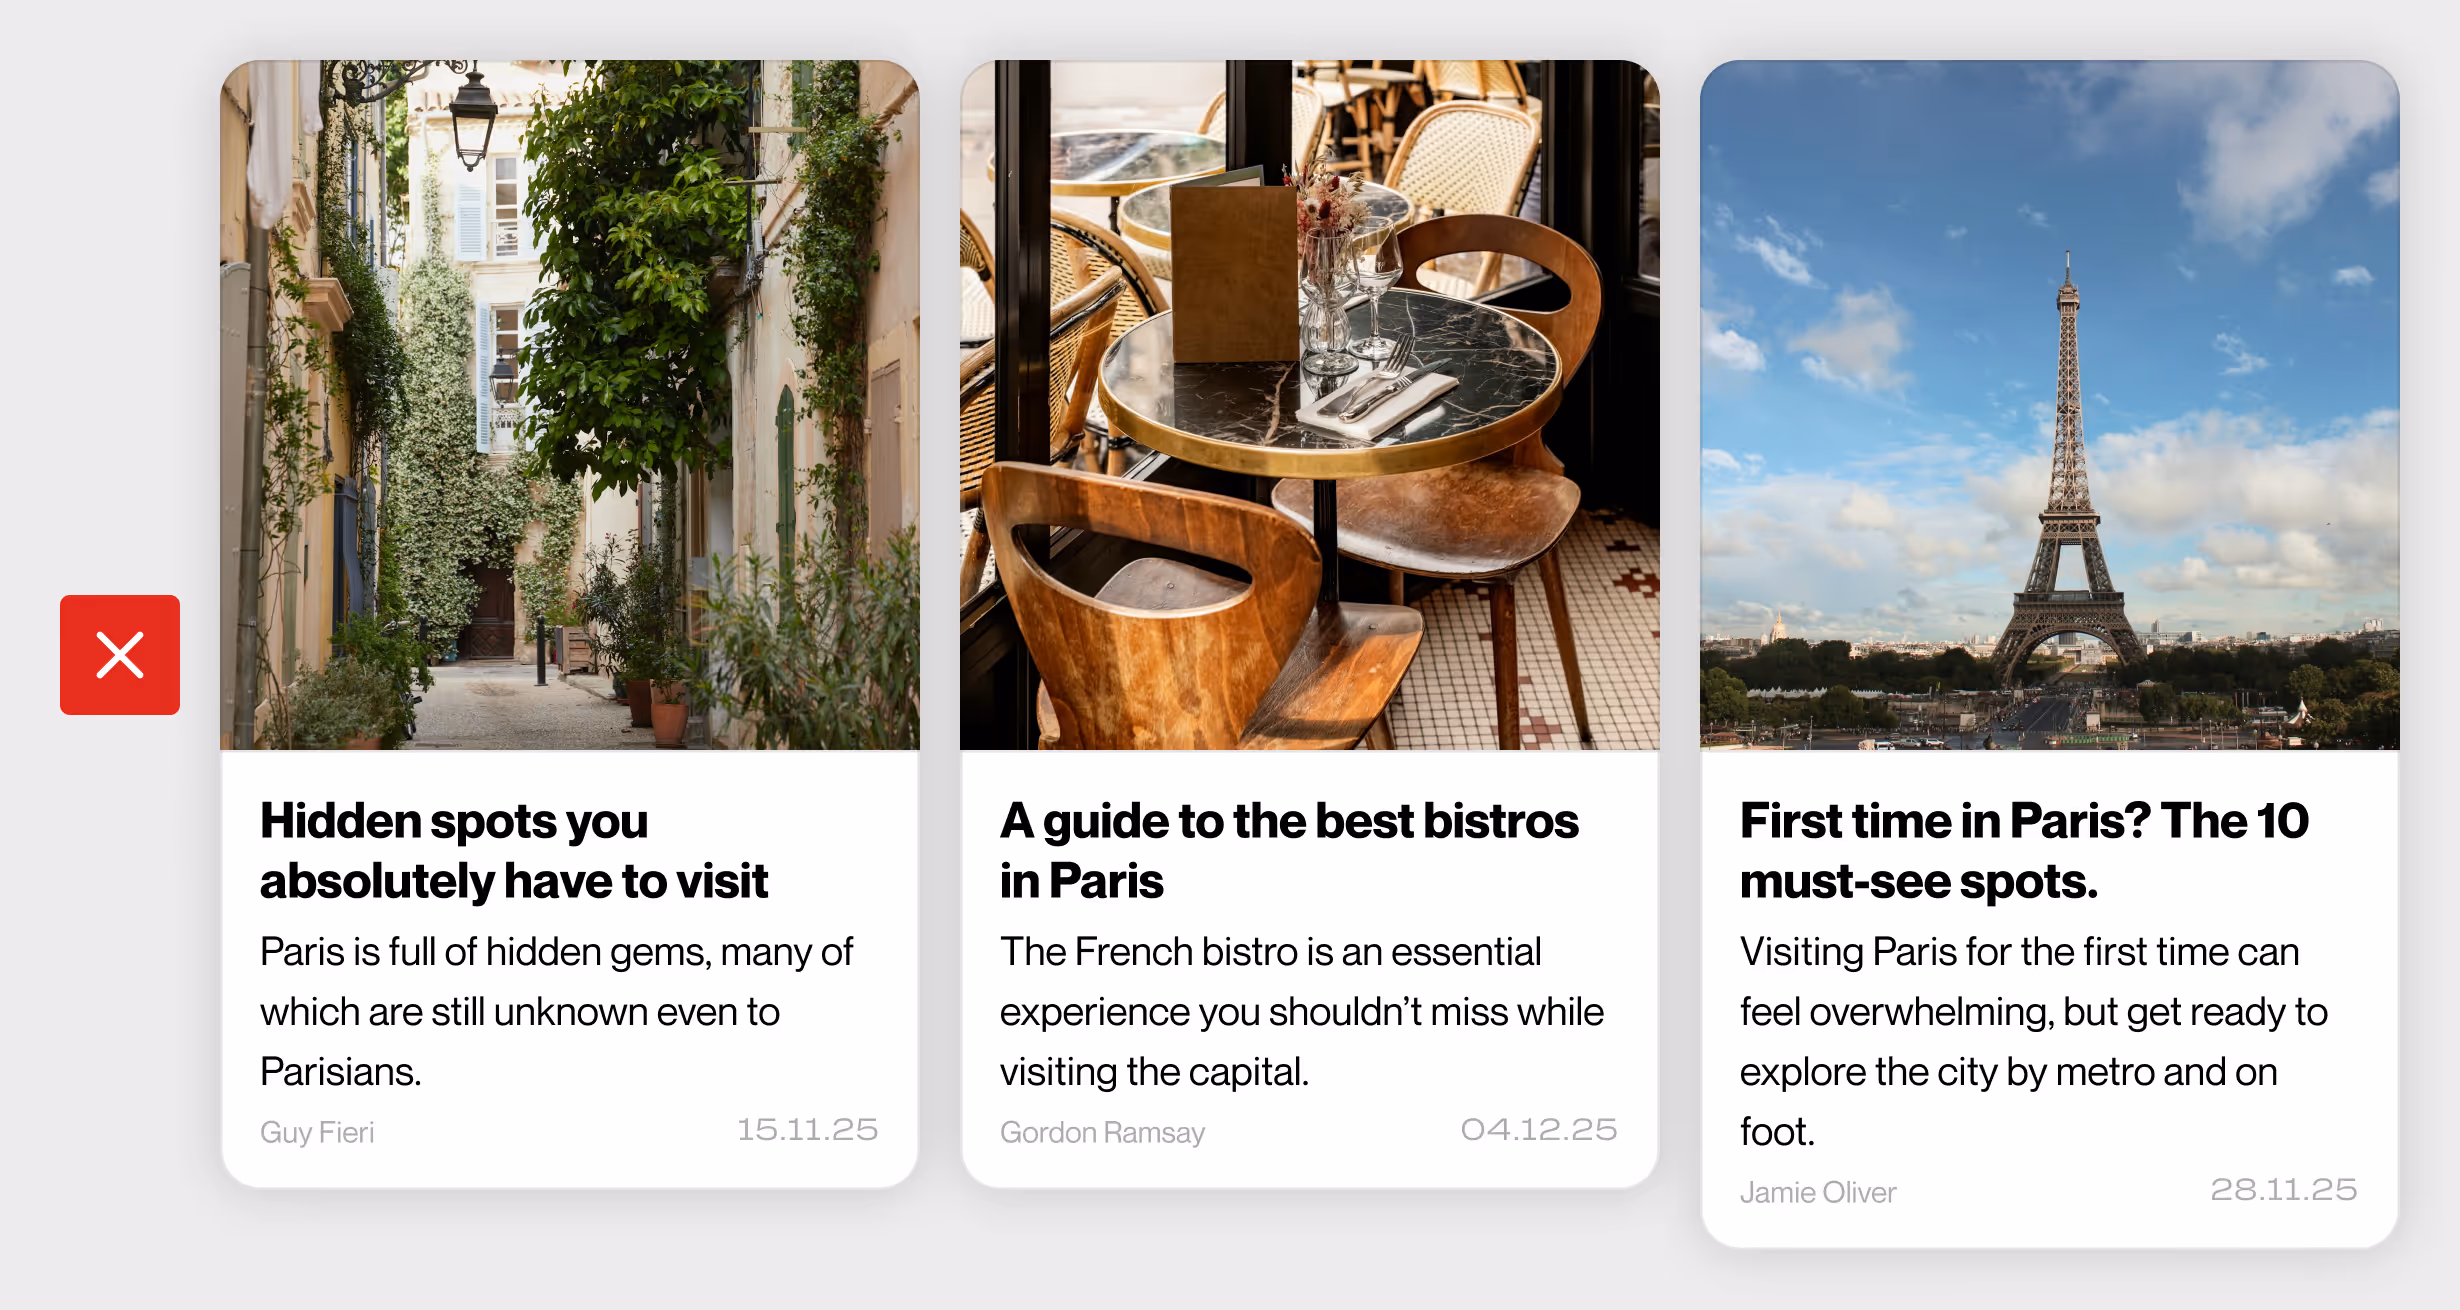
To fix it, use truncate, also known as text truncation.

What is text truncation used for?
This technique limits the visible text to a defined number of lines while keeping the beginning of the content visible. The layout remains stable, even when texts are longer than expected.
Beyond preserving visual structure, truncation can also create a subtle teasing effect, encouraging users to click and read more.
Benefits of text truncation for UI and UX
Truncation primarily helps secure a design against unpredictable content.
It helps to :
- improve interface readability,
- maintain visual consistency between blocks,
- ensure a uniform presentation of article lists or cards.
From an SEO perspective, truncation has no direct impact on rankings. Search engines still analyse the full content present in the DOM, even if it is visually truncated. However, improved readability and faster content understanding can enhance user experience, click-through rates, and engagement, indirectly contributing to better performance.
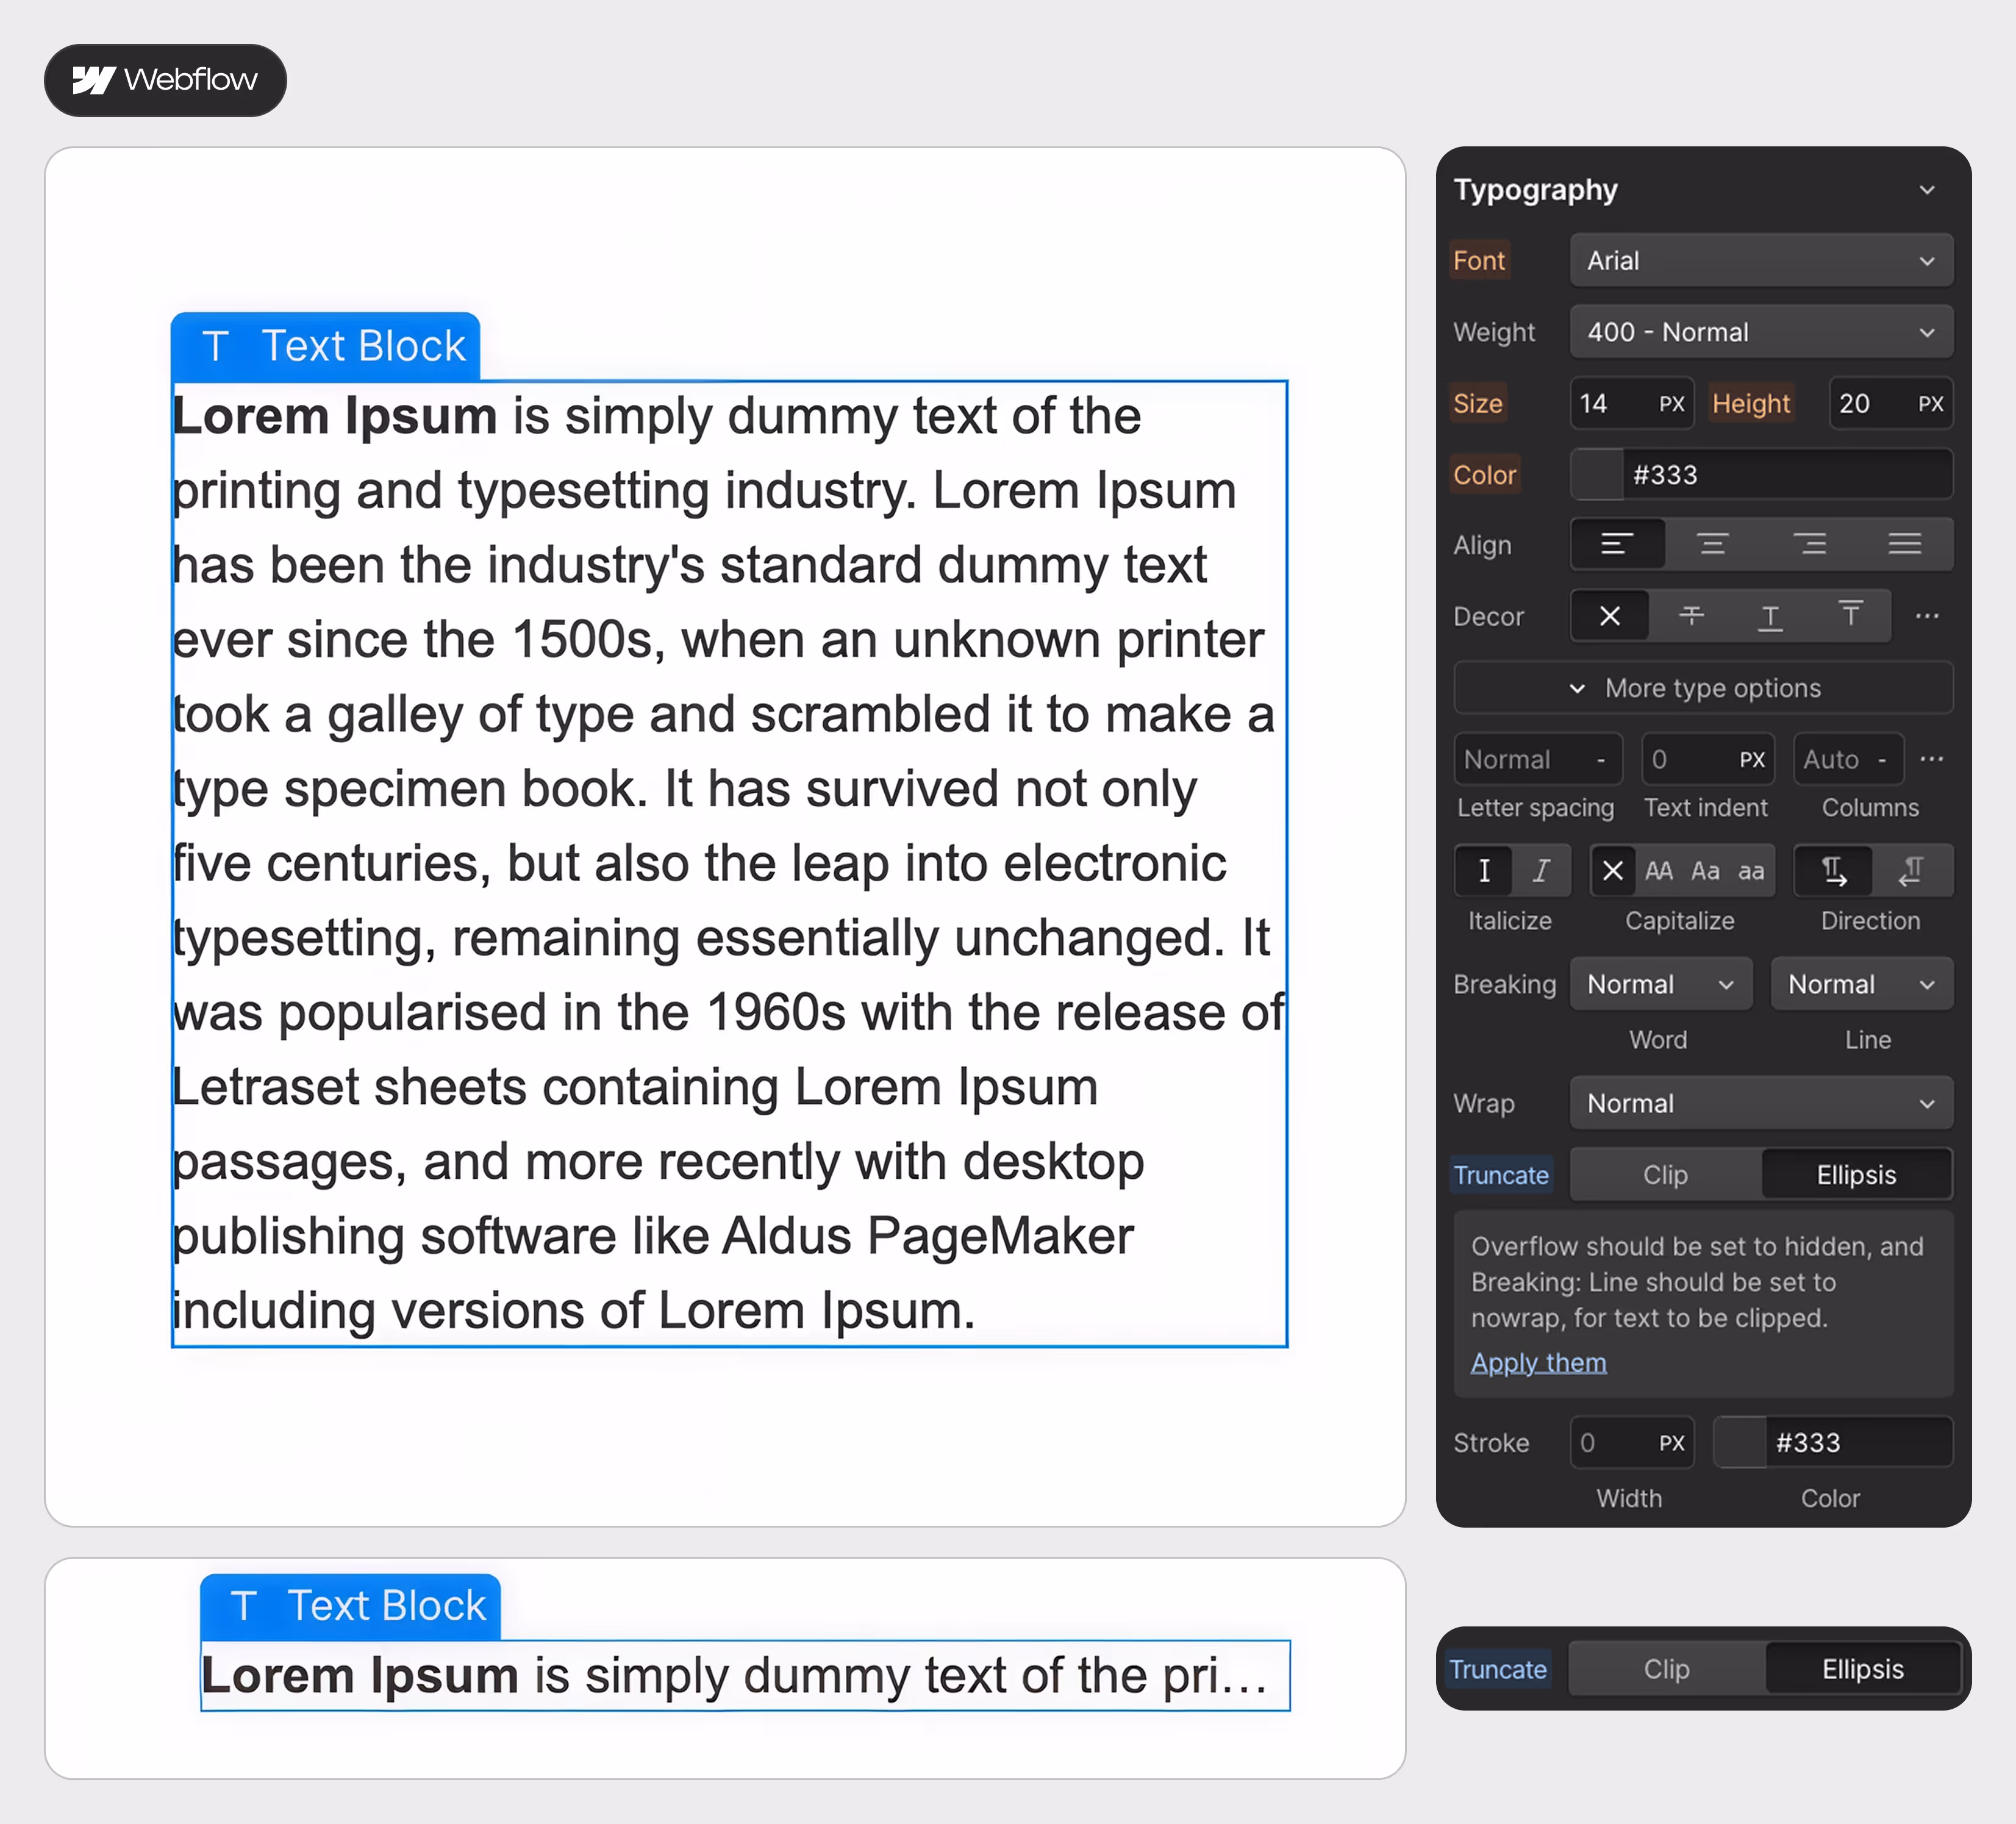
How to truncate text in Webflow
There are two ways to implement truncation in Webflow, depending on your needs.
Option 1 : 100% No-code
Use the built-in Webflow feature.
Once the text you want to truncate is selected, follow this path:
Typography → More type options → Ellipsis → Allow them.
The text will be truncated automatically and adapt to the size of its container.
Please note: this option does not allow you to define the number of visible lines before truncation.
Option 2 : Low-code
Below is a code snippet to add to the Custom Code section of your page or your site settings.
Once added, apply the .truncate class to any text element you want to truncate.
The code can be customised (class name, number of lines, etc.).
<!-- Truncate -->
<style>
  .truncate {                          /* Class to use or modify */
    display: -webkit-box;              /* Required for line clamping */
    -webkit-line-clamp: 2;             /* Number of lines to display */
    -webkit-box-orient: vertical;      /* Sets vertical box orientation */
    overflow: hidden;                  /* Hides overflowing content */
    text-overflow: ellipsis;           /* Displays ellipsis (…) when truncated */
  }
</style>
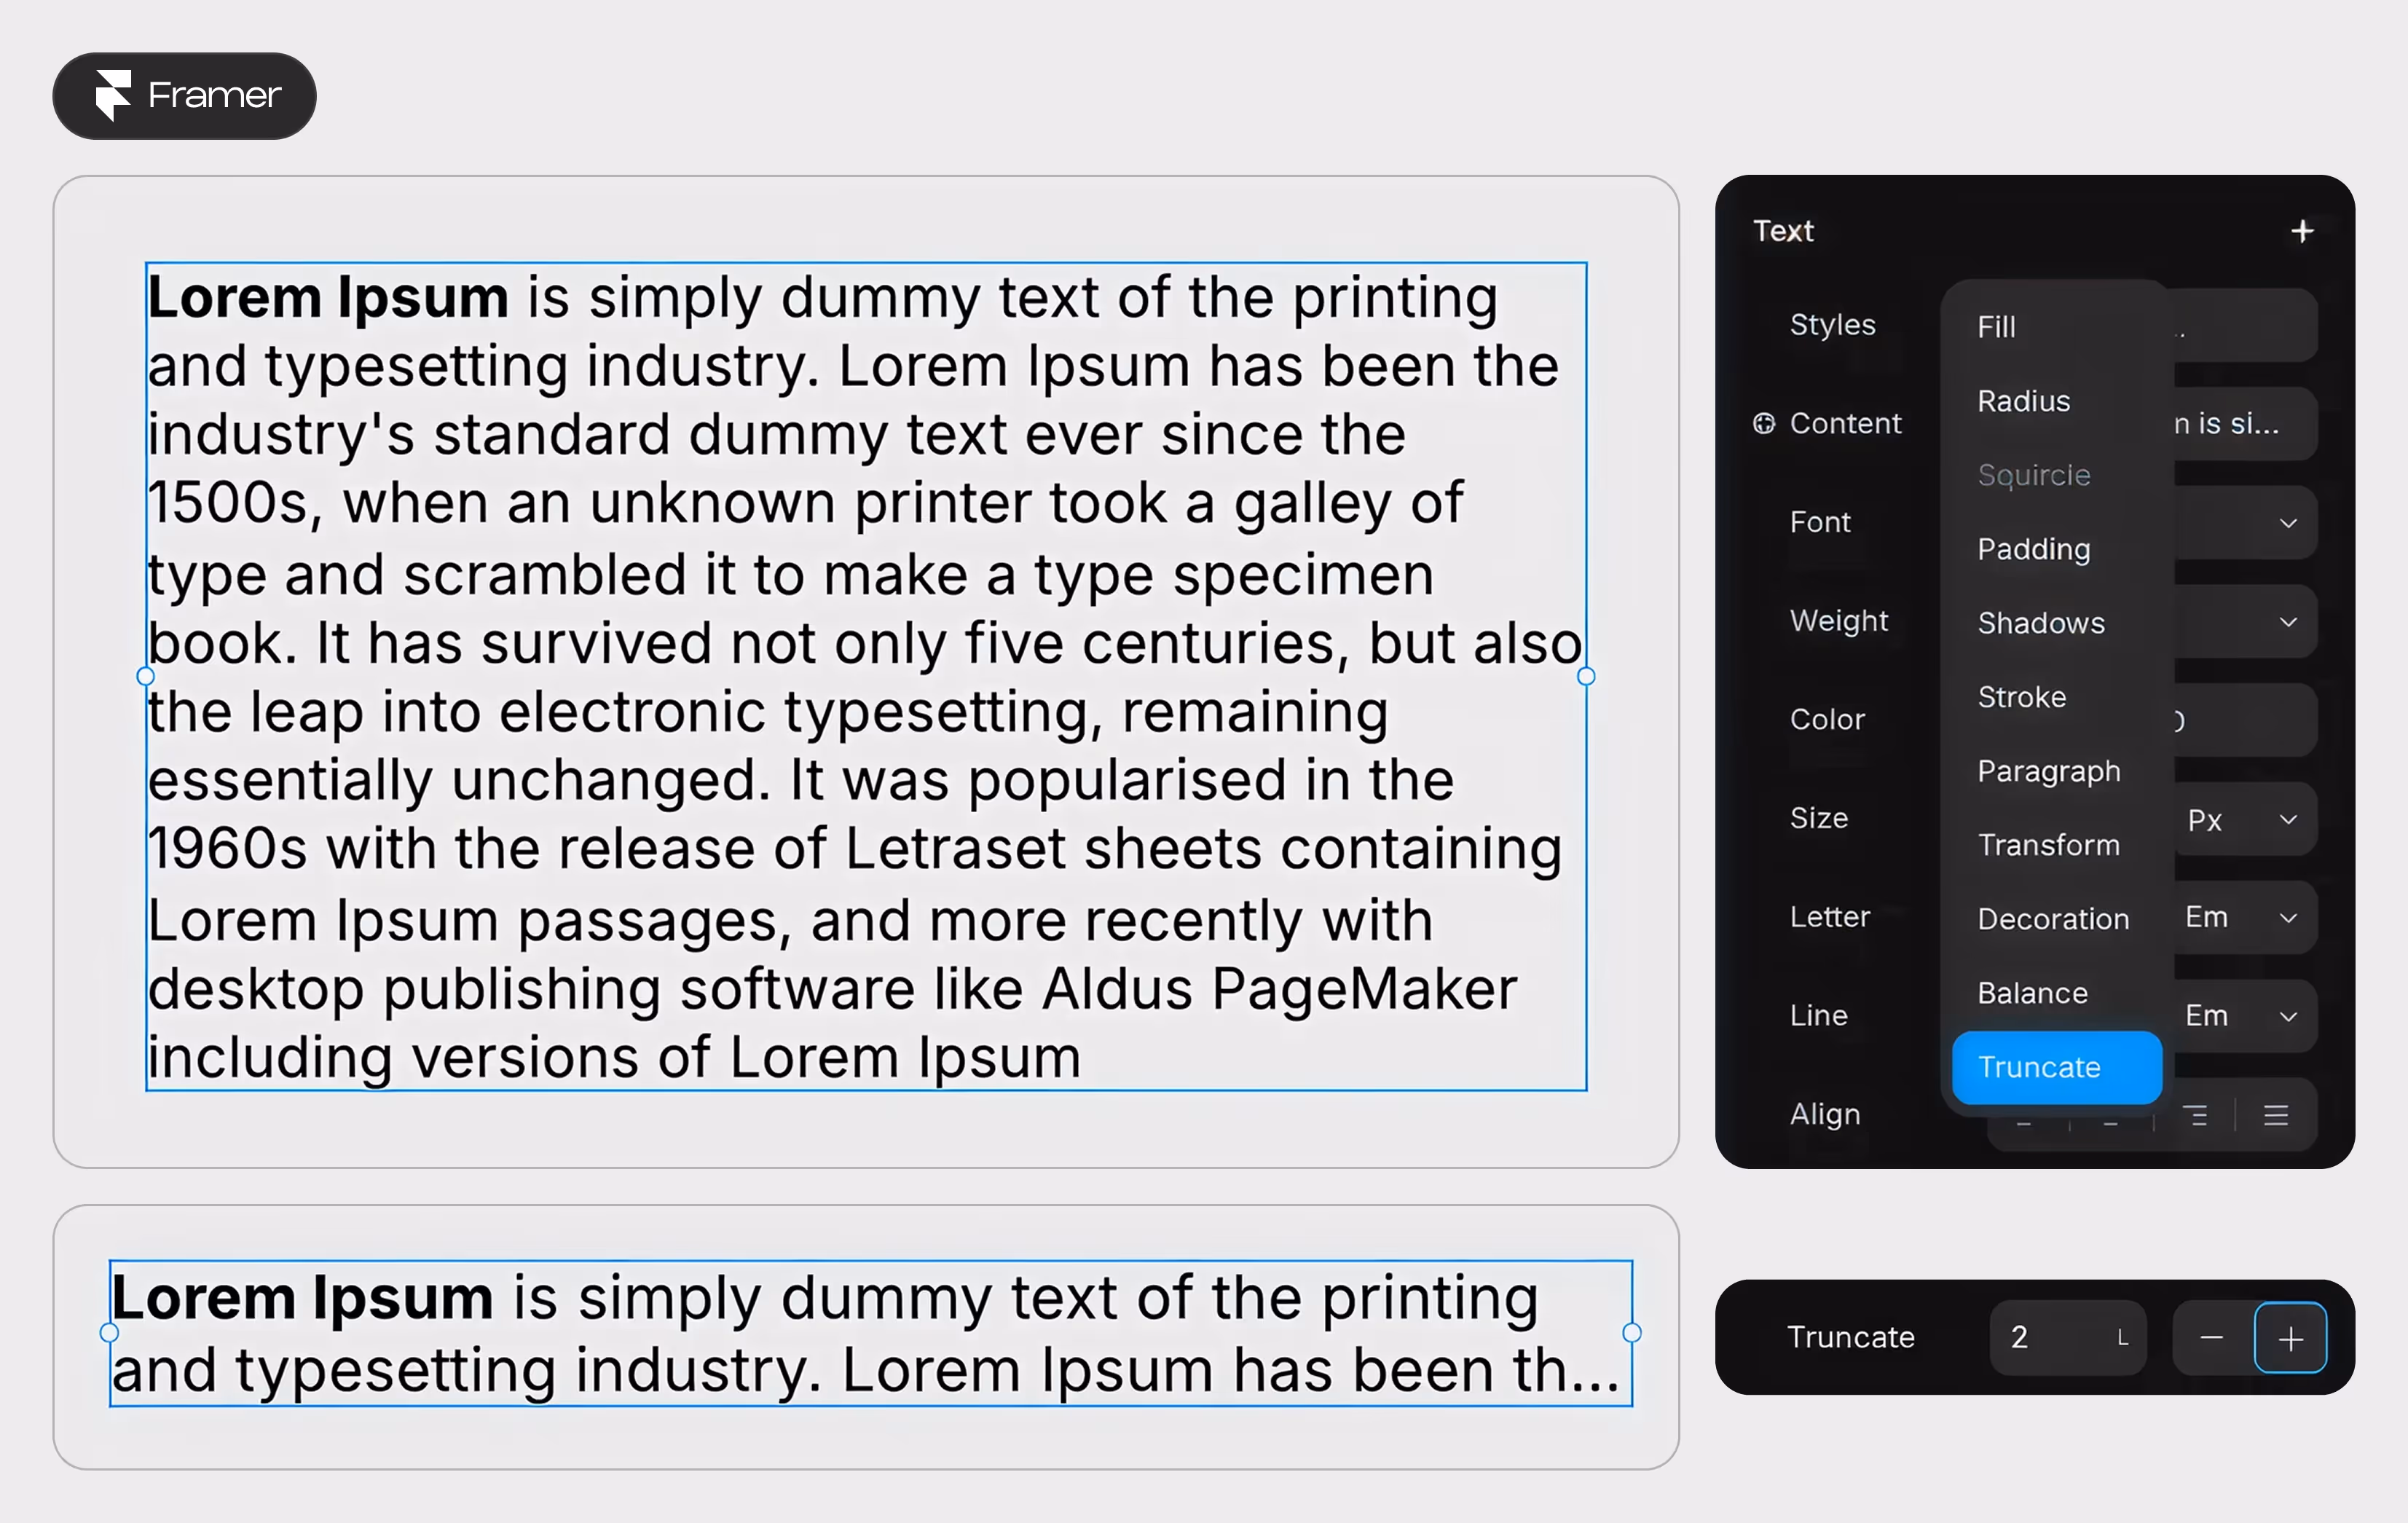
How to truncate text in Framer
To apply truncation in Framer, select the relevant text, then right-click in the right-hand panel where text styling options are located and add “truncate”.
Once enabled, the text will be truncated, and a new option will appear in the right panel, allowing you to define the number of lines after which truncation applies.
To make this behaviour scalable, you should apply it directly within a component.
Conclusion
Text truncation is a small detail, but it can make a huge difference in your projects.
So, whether you are building with Webflow or Framer, planning for long and unpredictable content helps keep your layouts clean and scalable. It protects your UI from breaking and makes your design more resilient over time.
In no-code development, thinking about content behaviour early is just as important as visual design.